Home Assistant Integration
Aqua-Scope WiFi devices can be integrated directly into Home Assistant. The integration is based on MQTT and uses Home Assistant's MQTT Discovery feature — once enabled, all sensors, actuators and alarms appear automatically in the dashboard.
Prerequisites
- A running Home Assistant installation (e.g. Home Assistant OS on a Raspberry Pi)
- The local IP address of the Home Assistant system
- An Aqua-Scope device with WiFi connection set up
If you do not know the IP address of your Home Assistant system, install the "Local IP" add-on from the Home Assistant Add-on Store. It displays the current IP address directly in the dashboard.
Step 1: Install the Mosquitto MQTT broker
Home Assistant needs an MQTT broker through which the Aqua-Scope devices communicate. We recommend the official Mosquitto broker add-on.
- In Home Assistant, open Settings → Add-ons → Add-on Store
- Search for "Mosquitto broker"
- Click Install
- After installation, enable the "Start on boot" option
- Click Start

Step 2: Create an MQTT user
The Aqua-Scope devices authenticate against the broker with a username and password. Create a dedicated user for this purpose.
- Open Settings → People (or Users)
- Click Add Person / Add User
- Enter a display name and username, e.g.
mqtt-user - Choose a strong password and confirm it
- Click Create
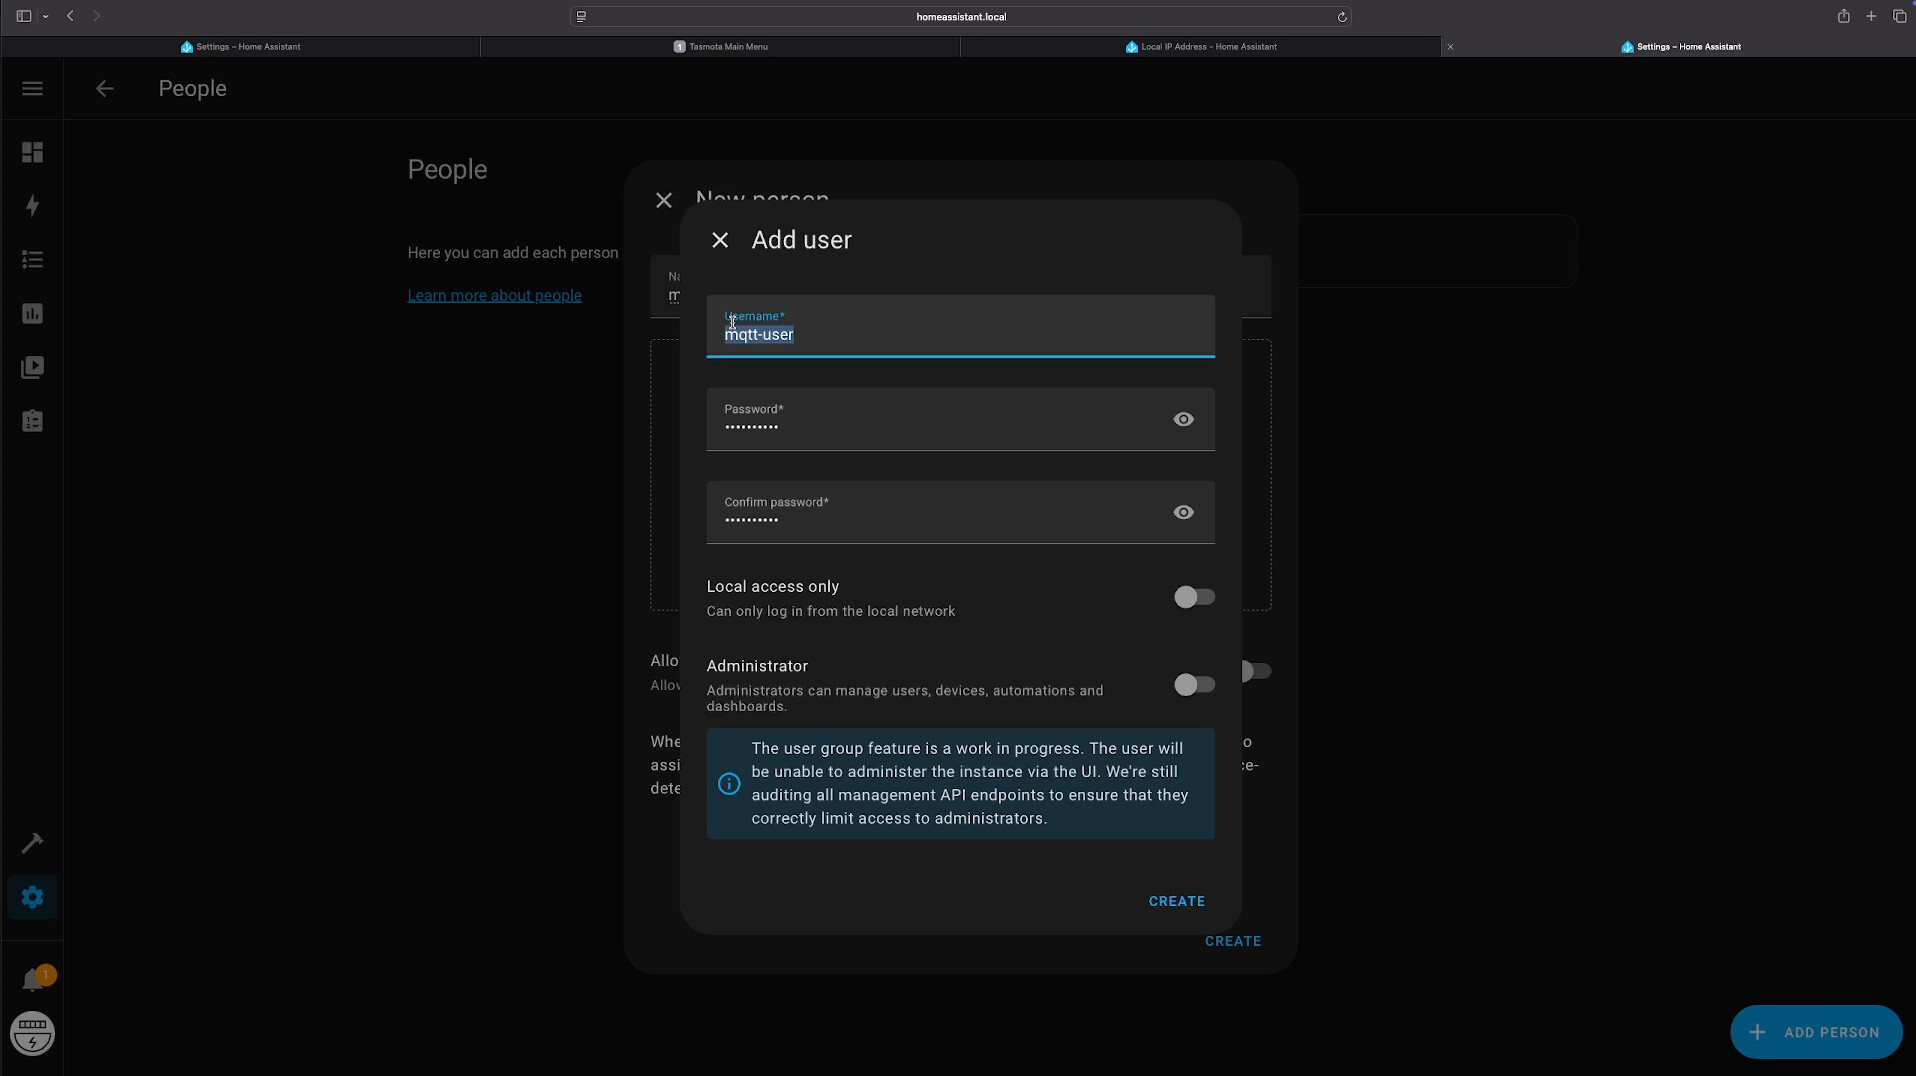
Note down the username and password — both are needed again in Step 4 and Step 5.
Step 3: Restart Home Assistant
For the newly created user to be recognised by the MQTT broker, a restart is required:
Settings → System → Hardware → Restart
Step 4: Configure the MQTT integration
After the restart, connect the MQTT integration with the new user.
- Open Settings → Devices & Services
- Search for MQTT and click Configure (or add the integration if not yet present)
- Enter the following details:
| Field | Value |
|---|---|
| Broker | core-mosquitto |
| Port | 1883 |
| Username | mqtt-user |
| Password | the password chosen in Step 2 |
- Click Submit
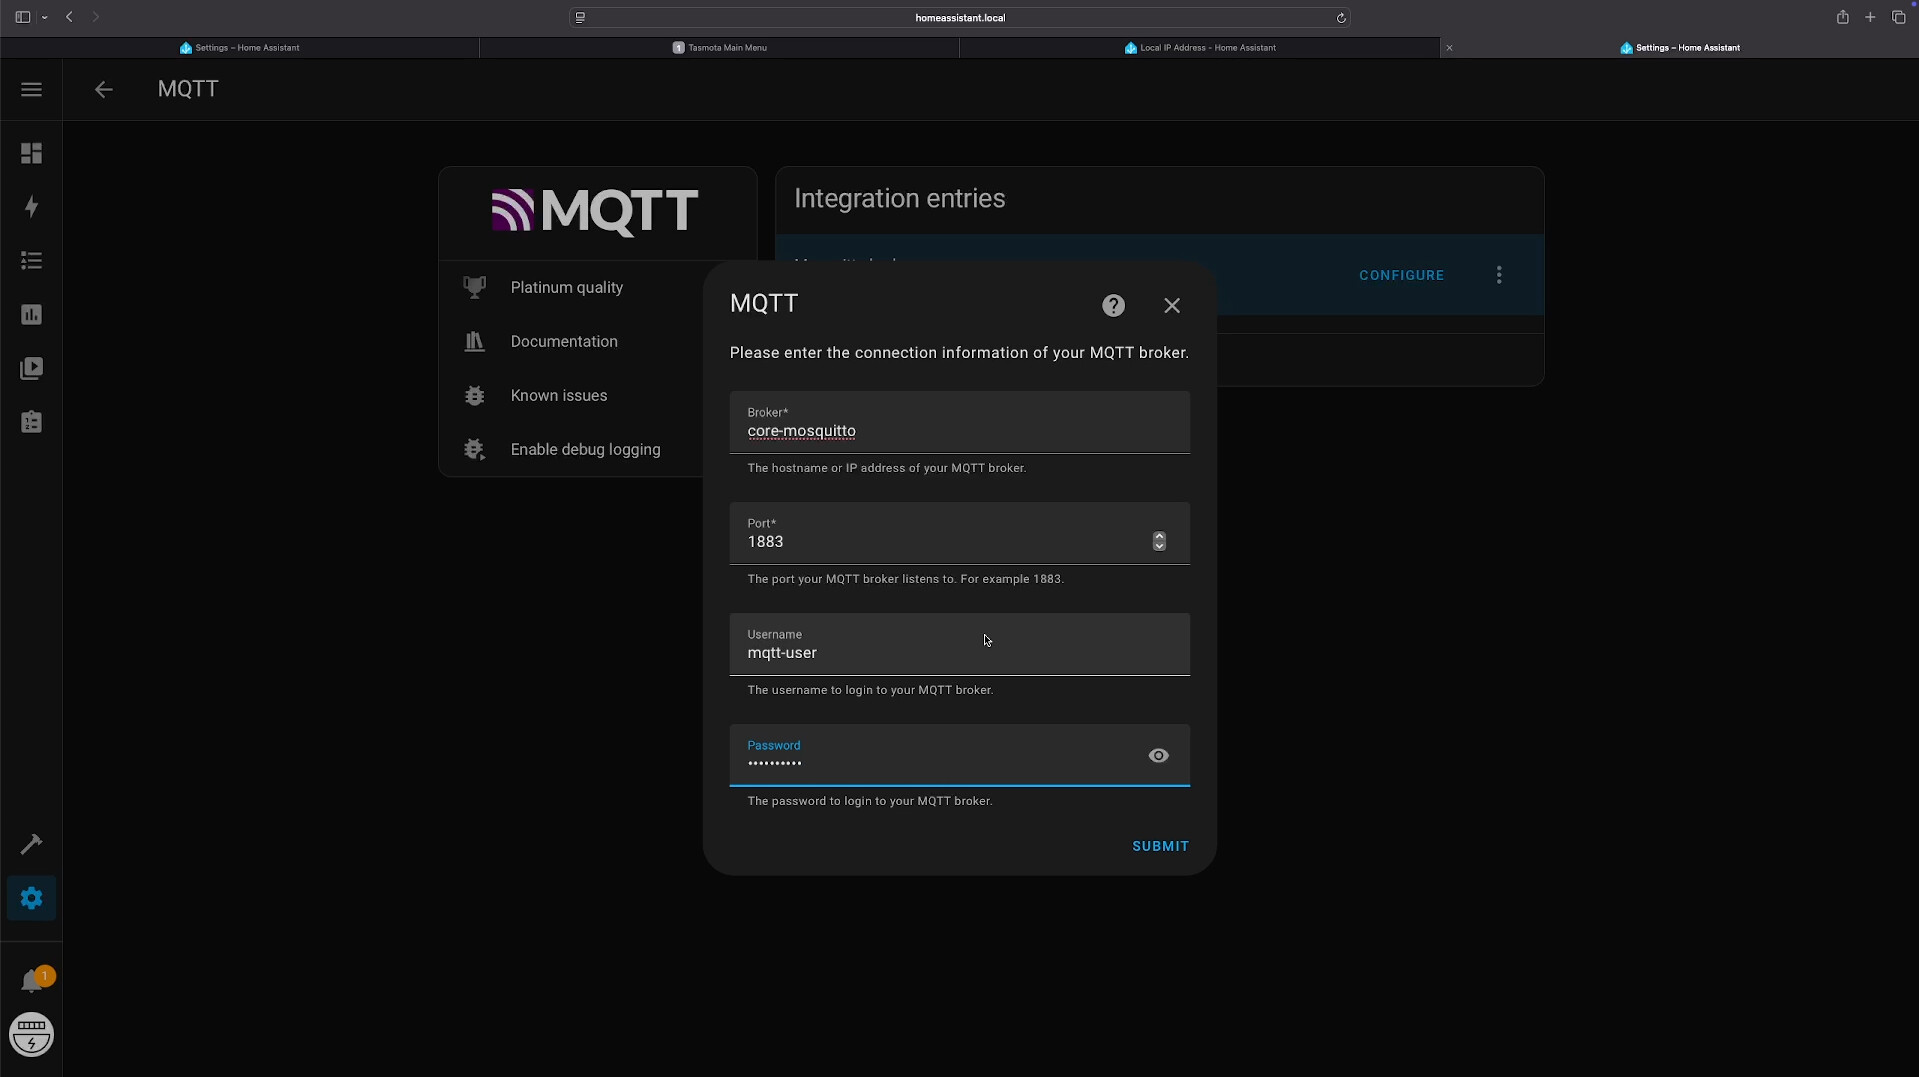
The integration should now show "Configured" and the Mosquitto add-on should report "Running".
Step 5: Connect the Aqua-Scope device to the broker
To make the Aqua-Scope device send its data to Home Assistant, the MQTT connection details must be stored on the device.
- Open the Aqua-Scope app
- Select the desired device
- Navigate to Configuration → Communication Options
- Enable MQTT and enter:
| Parameter | Value |
|---|---|
| Server | IP address of your Home Assistant system (e.g. 192.168.1.42) |
| Port | 1883 |
| Username | mqtt-user |
| Password | the password chosen in Step 2 |
See the MQTT page for details on the MQTT parameters.
Step 6: Enable Home Assistant Support
- With the device still open in the Aqua-Scope app
- Under Configuration, enable the "Home Assistant Support" option
- Save
Once enabled, the device automatically publishes MQTT Discovery messages to the broker. Home Assistant detects the device and creates all entities on its own — no entries in configuration.yaml are required.
Automatically discovered entities
Once Home Assistant Support is active, the following entities appear depending on the device type:
Sensors
| Sensor | Devices |
|---|---|
| Temperature | All devices |
| Water pressure | AQS, AQX, PRE |
| Water consumption | AQM, AQX |
| Rainfall | RAN |
| Humidity | FLO, CLP |
| Battery status | All battery-powered devices |
Actuators
| Actuator | Devices |
|---|---|
| Valve Open/Close | BVS, KFR (via monitor) |
Alarms
All alarm messages from the device (leak, overpressure, frost, etc.) are available as MQTT events and can be used in automations.
Every alarm message contains a source field:
source: 0— alarm from the main devicesource: 1or higher — alarm from a paired sub-device (e.g. flood sensor or motor)
Example automation
On a flood alarm, send a mobile notification and turn on the basement light:
automation:
  - alias: "Aqua-Scope Flood Alarm"
    trigger:
      - platform: mqtt
        topic: "/AQS/12345678/alarm"
    condition:
      - condition: template
        value_template: "{{ trigger.payload_json.alarm == 'flood' }}"
    action:
      - service: notify.mobile_app
        data:
          message: >
            Water alarm! Flood sensor has detected water.
            (Source: {{ trigger.payload_json.source }})
      - service: light.turn_on
        target:
          entity_id: light.basement
Replace 12345678 with the 8-character device ID of your Aqua-Scope device (printed on the device).
Tips & troubleshooting
Each Aqua-Scope device has a unique device ID. Any number of devices can be connected to the same broker in parallel and will appear as separate devices in Home Assistant.
If the device stays offline in Home Assistant, check:
- Is the IP address of the Home Assistant system entered correctly in the app?
- Has Home Assistant been restarted after creating the MQTT user?
- Are username and password correct?
- Does the firewall allow access to port
1883?
For a TLS-encrypted connection, use port 8883. See the MQTT page for details.
Supported devices
Home Assistant Discovery is supported by all WiFi-enabled Aqua-Scope devices: